Lecture 2
DANL 100: Programming for Data Analytics
Byeong-Hak Choe
Septermber 1, 2022
Announcement
Changes in Office Hours
- Office: South Hall 117B.
- Office Hours:
- Mondays 3:30 PM-5:30 PM
- Wednesdays 1:30 PM-3:30 PM.
Installing the Tools
Installing the Tools
R programming
The R language is available as a free download from the R Project website at:
- Windows: https://cran.r-project.org/bin/windows/base/
- Mac: https://cran.r-project.org/bin/macosx/
- Download the file of R that corresponds to your Mac OS (Big Sur, Apple silicon arm64, High Sierra, El Capitan, Mavericks, etc.)
Installing the Tools
RStudio
RStudio offers a graphical interface to assist in creating R code:
- The RStudio Desktop is available as a free download from the following webpage:
- https://www.rstudio.com/products/rstudio/download/#download
Installing the Tools
Excel
- If you have not installed Microsoft Office on your computer, visit software.geneseo.edu.
- Download and install Microsoft Office from the software.geneseo.edu.
Installing the Tools
Anaconda
- Anaconda is an all-in-one Python distribution.
- Anaconda includes Python 3.x and its standard modules such as pip, pandas, matplotlib, etc.
- Anaconda also includes several software applications of integrated development environment (IDE), which is a software for editing codes.
- For the Python code, we will use Spyder IDE.
- Do not use RStudio from Anaconda, because RStudio from Anaconda is out-dated.
- To install Anaconda, go to the following download page:
- https://www.anaconda.com/products/distribution.
- Click the "Download" button.
Installing the Tools
Spyder IDE
If Spyder IDE from Anaconda is lagging, consider installing it additionally.
To install Spyder IDE in addition to Anaconda, go to the following download page:
- https://www.spyder-ide.org.
- Click the "DOWNLOAD" menu.
Survey
While installing the tools, click and take the following survey:
Submit the survey before the class ends.
Installing the Tools
Spyder Environment
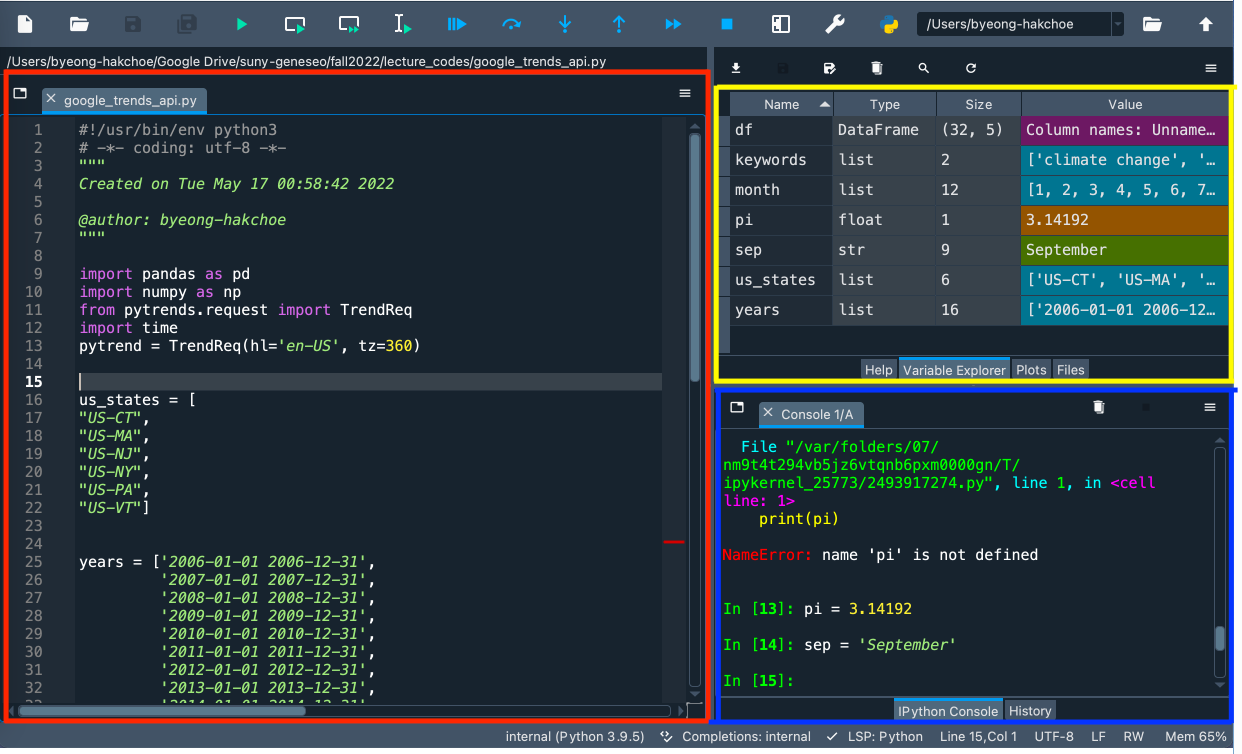
- Red box is Script Editor where you can create, open and edit files.
Installing the Tools
Spyder Environment
- Blue box is Console Pane that allows you to interact directly with the Python interpreter and type commands where Python will immediately execute them.
Installing the Tools
Spyder Environment
- Yellow box is Variable Explorer where you can see the values of variables, data frames, and other objects that are currently stored in memory.
- Double-clicking a variable will open a specialized viewer, allowing you to inspect its contents.
Management of Files, Directories, and Scripts
Management of Files, Directories, and Scripts
Some materials for data
- The following page has some materials of R codes and data files: https://github.com/WinVector/PDSwR2.
- Step 1. Go to your Download folder (or the folder where the downloaded file is saved) using the File Explorer.
- Step 2. Click the ZIP file.
- Step 3. Cut the file by using the shortcut (Ctrl+X).
- Step 4. Go to your working directory for the course using the File Explorer.
- Step 5. Paste the file to your working directory by using the shortcut (Ctrl+V).
- Step 6. Right-click the ZIP file and click "Extract ..."
- Step 1. Go to your Download directory (or the directory where the downloaded file is saved) using the File Explorer.
- Step 2. Click the ZIP file (or the directory if the ZIP file is extracted).
- Step 3. Copy the file (or the directory) by using the shortcut (command+C).
- Step 4. Go to your working directory for the course using the Finder.
- Step 5. Paste the file (or the directory) to your working directory by using the shortcut (command+option+V).
- Step 6. Right-click the ZIP file and click "Extract ..."
Management of Files and Directories
Finding the path name of the file
- Step 1. Go to your folder using the File Explorer.
- Step 2. Right-click the file.
- Step 3. Click "Copy as path".
- Step 4. Paste the path name of the file to the R script (Ctrl+V).
- Step 5.
- Option 1. Replace backslash(
\) with double-backslash(\\) in the path name. - Option 2. Replace backslash(
\) with slash(/) in the path name.
- Option 1. Replace backslash(
- Step 1. Go to your folder using the File Explorer.
- Step 2. Keep pressing the "Shift" key
- Step 3. Right-click the file.
- Step 4. Click "Copy as path".
- Step 5. Paste the path name of the file to the Python script in Spyder (Ctrl+V).
- Step 6.
- Option 1. Replace backslash(
\) with double-backslash(\\) in the path name. - Option 2. Replace backslash(
\) with slash(/) in the path name.
- Option 1. Replace backslash(
- Step 1. Go to your folder using the Finder.
- Step 2. Right-click the file in the folder
- Step 3. Keep pressing "option"
- Step 4. Click "Copy 'PATH_FOR_YOUR_FILE' as Pathname" from the menu.
- Step 5. Paste it to the the Python script in Spyder (command+V).
Management of Files, Directories, and Scripts
Code and comment style
The two main principles for coding and managing data are:
- Make things easier for your future self.
- Don't trust your future self.
The
#mark is Spyder's comment character.#indicates that the rest of the line is to be ignored.- Write comments before the line that you want the comment to apply to.
Consider using block commenting for separating code sections.
#%%defines a coding block in Spyder.
Break down long lines and long algebraic expressions.
Starting with Python
Shortcuts
Mac
- F9 runs a current line (where the blinking cursor is) or selected lines.
- command + 1 is the shortcut for #.
- command + 4 is the shortcut for block comment.
Windows
- F9 runs a current line (where the blinking cursor is) or selected lines.
- Ctrl + 1 is the shortcut for #.
- Ctrl + 4 is the shortcut for block comment.
Working with Data from Files
Step 1. Find the path name for the file,
car.data.csv, from the sub-folder, 'UCICar', in the folder, 'PDSwR2-main'.Step 2. In the code below, replace 'PATH_NAME_FOR_THE_FILE_car.data.csv' with the path name for the file,
car.data.csv.Step 3. Run the following Python code:
import pandas as pdpath = 'PATH_NAME_FOR_THE_FILE_car.data.csv'# reading datauciCar = pd.read_csv(path)